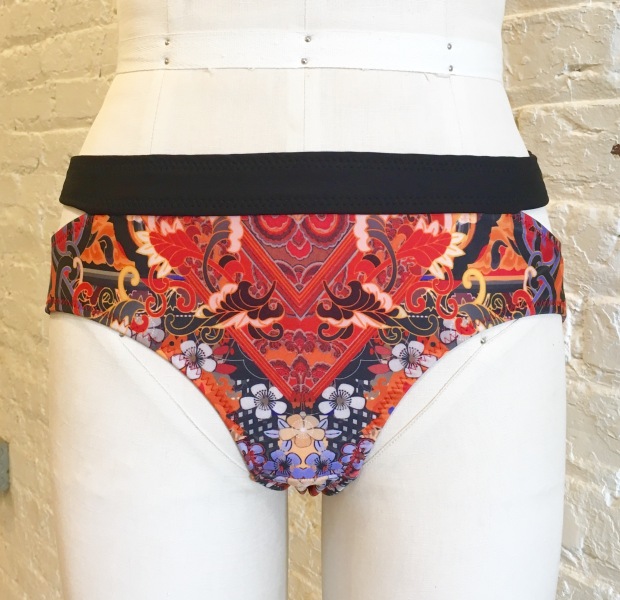
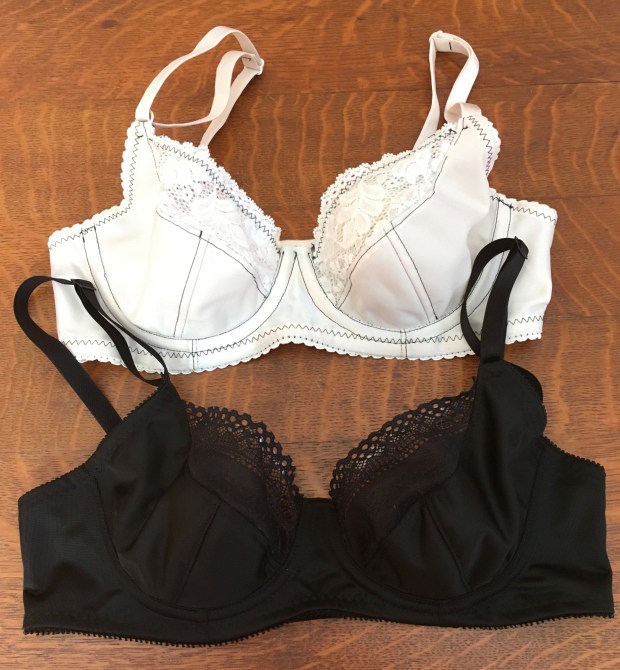
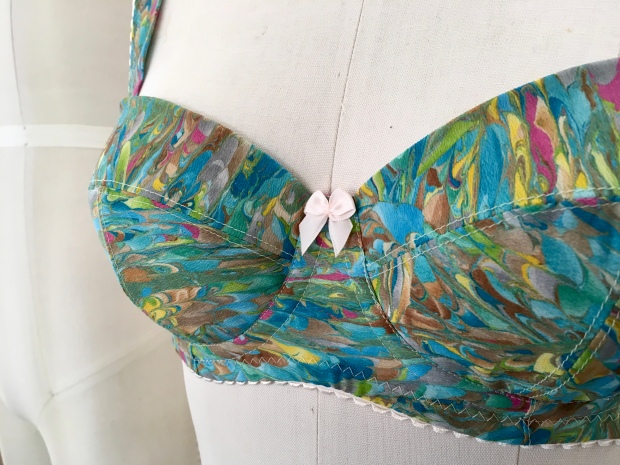
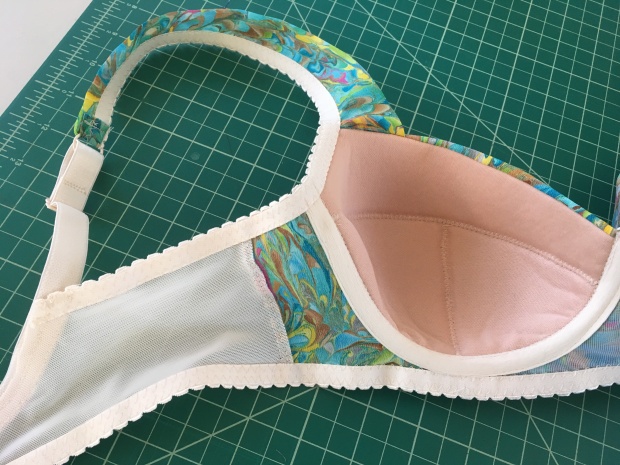
Evie la Luve Mimi Bikini

One of the primary reasons I sew is to avoid judging my body against industry standards every time I try on a ready-to-wear item of clothing.  Sewing has empowered me to never need to step into a store changing room again.  And if there is any task that instills fear and dread in most women, including me, it is trying on ready-to-wear swimsuits. Most of us would rather wear the suit we own, despite its condition, than shop for a replacement.

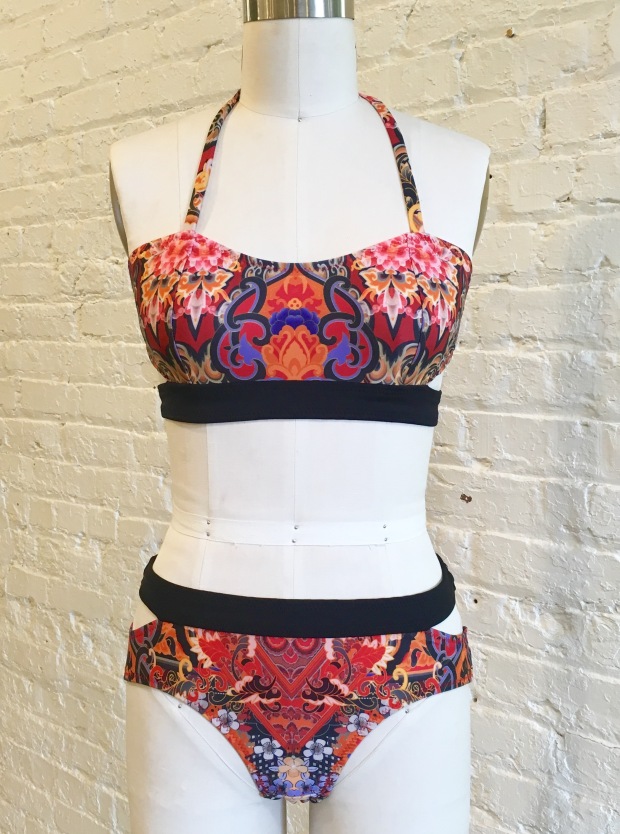
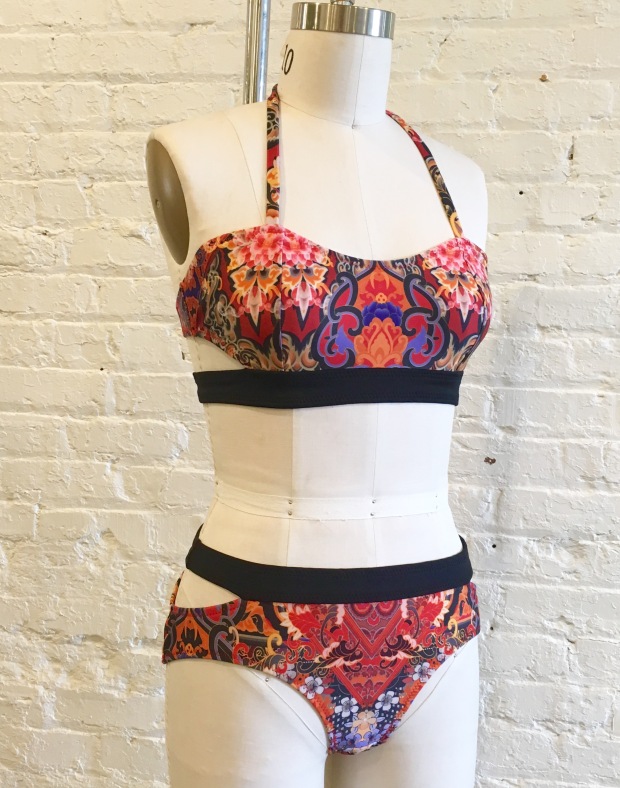
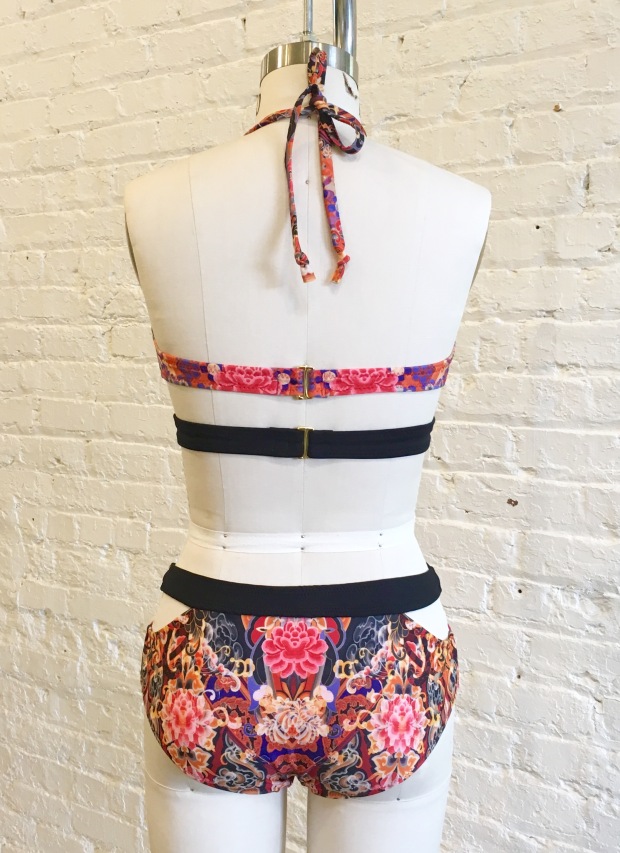
Enter, my Evie la Luve Mimi bikini.
FullSizeRender 3

As soon as I spotted this pattern on Hannah’s IG feed, I knew I needed to make one. I love her patterns.  Her instructions are spot on.  And I love this design.  I waited patiently for the pattern release.  I bought and downloaded it within an hour of it becoming available.  Then I got intimidated, knowing the pattern would likely need alterations.  So it sat and sat and sat in my sewing queue while I cranked out perfectly-fitted lingerie sets instead.

Once I convinced myself to just make it already, I learned I was right. It took three attempts and quite a few modifications for me to get this suit to work for me. But in the end, it was totally worth it (obviously).
FullSizeRender 7

Based on the size chart provided with the pattern, I sewed an extra-small top and an extra-large bottom.  (Another bonus to sewing your own swimwear is flexibility to mix and match the sizing of the pieces). With a full hip measurement of just a smidge over 40″ I probably could have sewn the bottoms in large, but I tend to round up with anything concerning fit around my bum.  As a result, and as expected, my first pair ended up too big around the waist and hip. But in the long run, given the modifications I ended up making, that size choice was a good one.
FullSizeRender 9

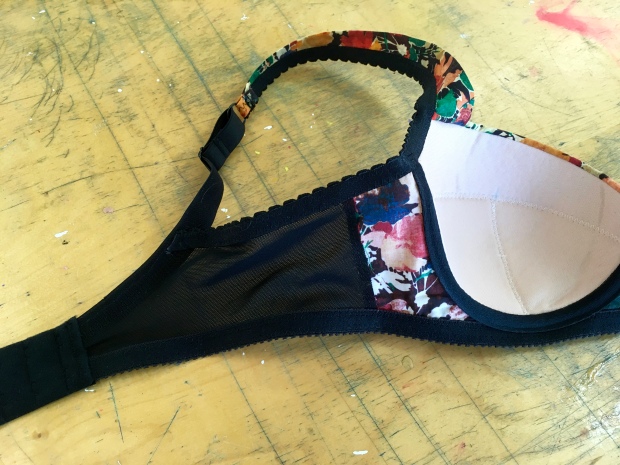
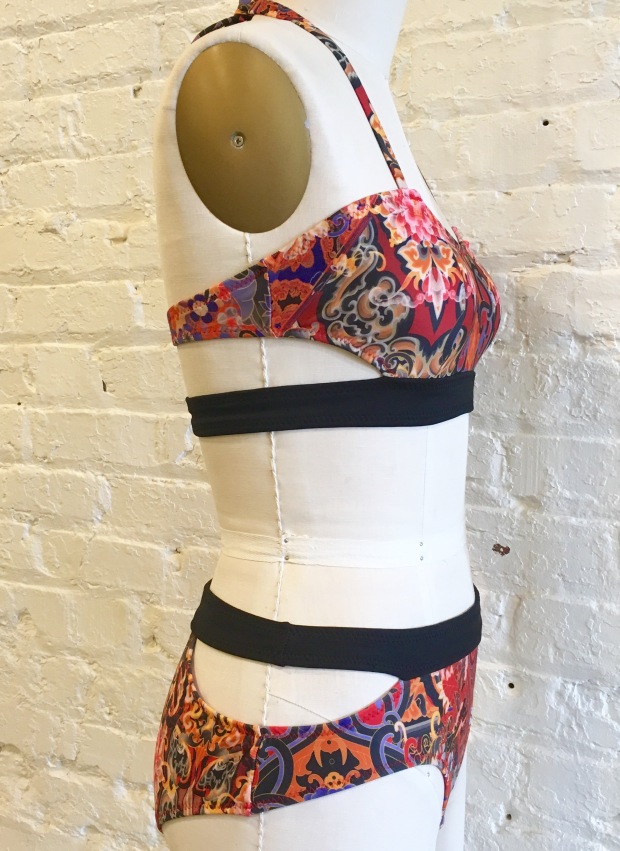
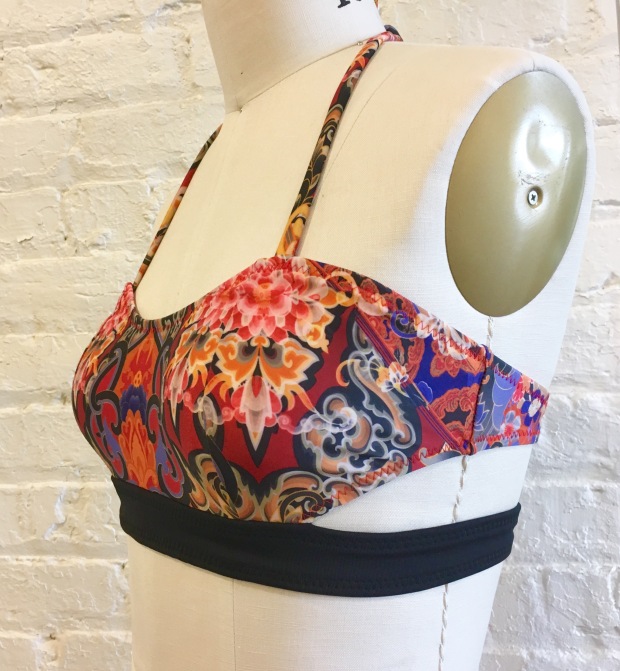
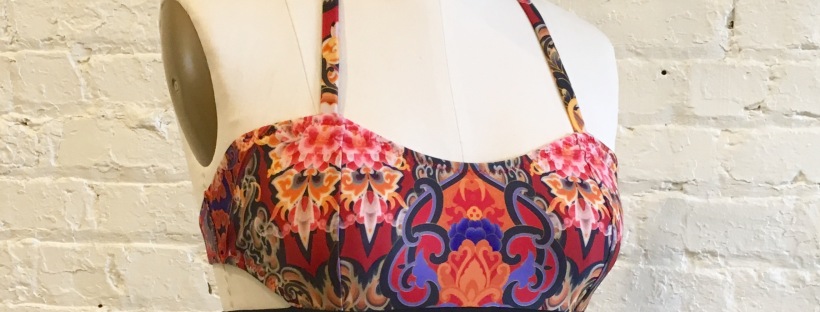
I did not make any design changes to the bikini top. However, if I were to make it again (a 4th time), I may shorten the princess seams and drop the upper edge / neckline by 1/2″.  As Ying explains in her pattern review, this top was drafted for a larger cup size than I am, so the neckline is a little high and may be a tad too modest on me.

I should share, if you ever sew swimwear, this pattern includes instructions on a superb construction method for swimwear straps.  (There is also a video on her YouTube channel.) There is no visible stitching and they sit nice and flat.  I’ll be making all my swimwear straps this way going forward.

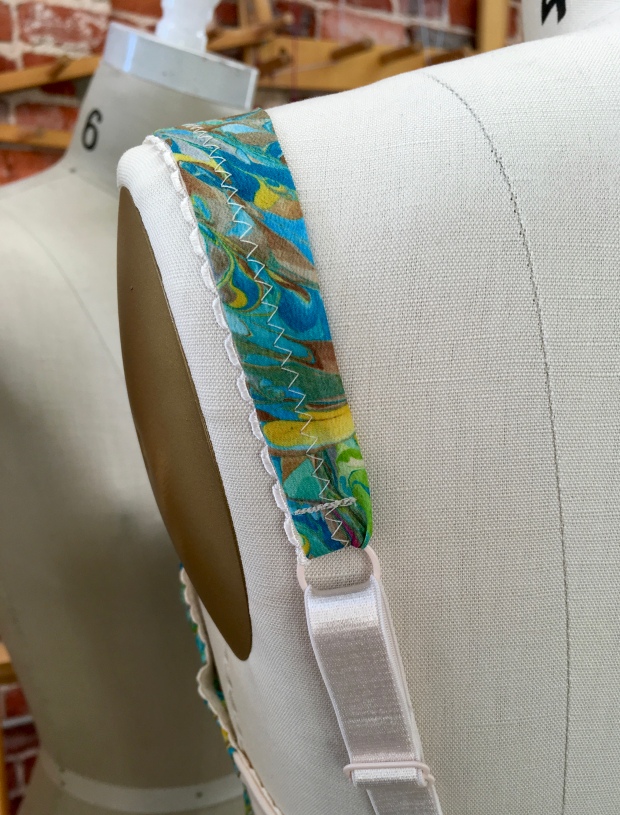
However, I did make one small adjustment when making the straps.  I do not like the bulk that results from folding the strap back on itself when attaching it to the bikini top (done to avoid any raw edges from showing).  On this version, when I assembled each strap, I trimmed 1/2″ off the length of the elastic before attaching it to the fabric and turning it inside out.  This meant the bottom 1/2″ of each strap was just a double layer of fabric. So when I attached the strap to the top, tucking the end under, there was less bulk since there is only one layer of elastic. Very minor change, but I prefer the result.
FullSizeRender 4

Here are the modifications I made to the bikini bottoms:

  • I’m petite (barely 5’2″ on a tall day) and short-waisted, so these were a very high-rise bottom for me, with the upper band landing just below my navel. I did not like the look.  To fix this, I did two things, I:
    • shortened the front main and back main pieces by 1/2″
    • attached the upper band in the front and back at the line for the medium pattern piece rather than the extra large piece, essentially trimming another 1/2″ off the top.  This modification also made the cutouts on the sides of the bottoms smaller, which I prefer.
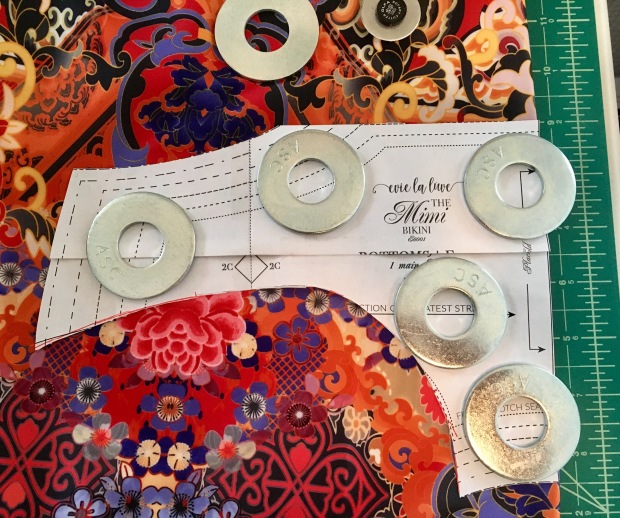
  • The leg opening was very low cut in the front on me, fitting almost like a boy-short. I trimmed 3/4″ from the front leg opening at the center point between the hip and crotch seams, fading to nothing at those seams.
  • I trimmed 1/4″ from the back leg opening at the center point between the hip and crotch seams, fading to nothing at those seams, making the back of the suit slightly cheekier. We’ll see if I regret that once I walk around in it a bit.
  • I tinkered with the length of the upper front/back band so many times I can’t be sure, but I believe I ended up shortening that by about 1/2″. Having that piece the correct length is critical to avoid gaping, or even worse, the dreaded bulging in the cutouts. The fit of this strap alone makes creating a sample garment first well worth the cost in supplies, IMHO.
FullSizeRender 10

My final front pattern piece

FullSizeRender 8

I am not sure this is the best bathing suit design for my body shape. (Is there such a thing, though?) But I love the cutouts, these two fabrics paired together, and that I will certainly not see anybody else wearing it.  And I especially love that I made it.
FullSizeRender 6

It is unlikely I’ll get weather warm enough to wear this suit before my trip to Mexico in November.  But if you follow me on IG (@sarahycurtis), you’ll likely see pics of me wearing it lounging around the pool sipping a beverage, or two, then.  Cheers.

Patterns: Evie la Luve Mimi Bikini, modified
Fabrics: Marrakesh Paisley nylon/spandex and solid black nylon/spandex swimwear fabric and nylon swimwear lining from The Fabric Fairy
Findings: (2) 1″ gold g-hooks and 3/8″ rubber swimwear elastic from Tailor Made Shop
Modifications: The bottoms needed to be modified to better suit my shape, details above
Photo Location: Visual Arts Center of Richmond
Strappy Simplicity 8229 & Bella Panty

Because not all lingerie in intended for daily wear.

You can thank Madalynne for inspiring this project. The minute I saw her take on the $675 Agent Provocateur set, I knew I needed to make my own version.

IMG_3866

My loveliest lingerie set.

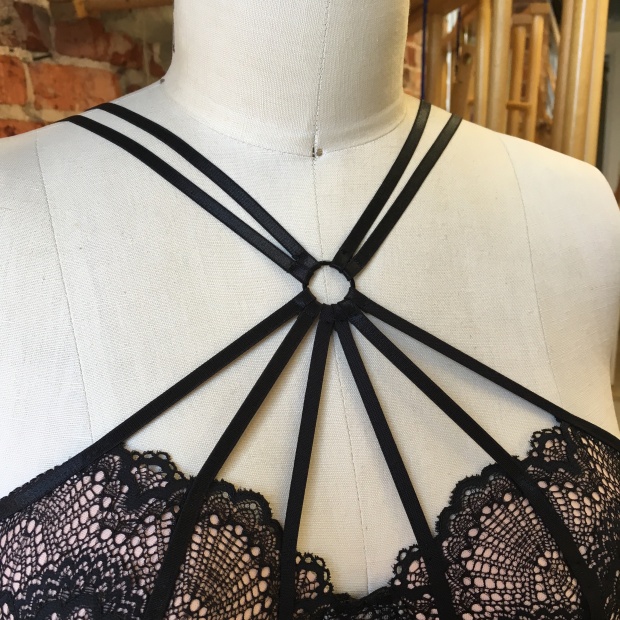
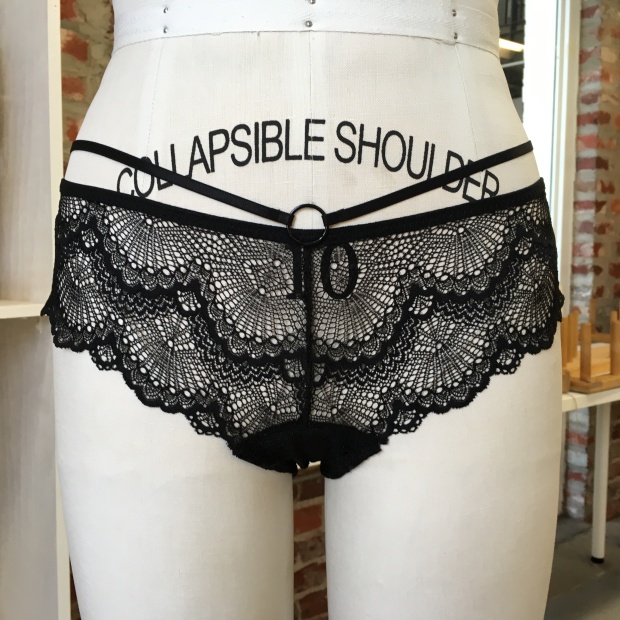
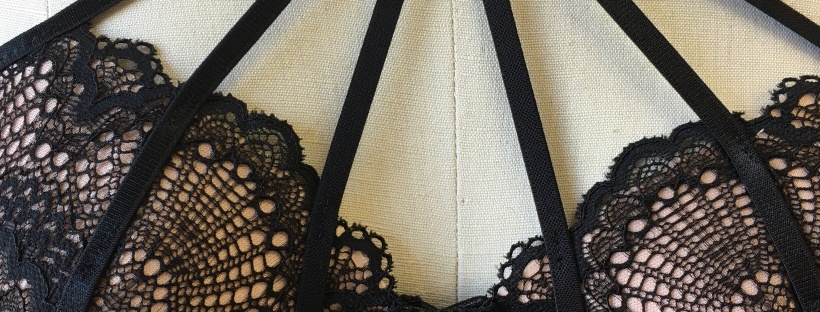
It is a super-strappy variation of Simplicity 8229 (previous versions here) paired with a modified Evie La Luve Bella panty.  That is five yards of strapping!

IMG_3880

This set took me a long time to make as a result of lots of tinkering with straps and fittings coupled with my usual inability to sew for long stretches without constantly stepping away to refresh my tea cup. But it was worth it. I think it is quite possibly the most beautiful thing I have ever made. And it makes me smile every time I look at it; in part because I know how hard I worked to get it just right.

IMG_3548

IMG_3528

IMG_3556

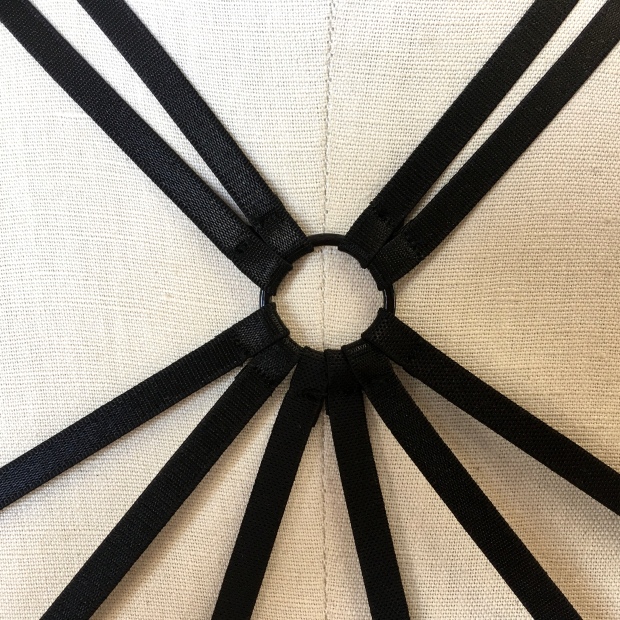
The four straps are attached at both the top and the bottom of the band for added strength.

IMG_3892

The Bella panty is sort of a boy-short in front…

IMG_3885

… and a cheeky tanga in back.

IMG_3888

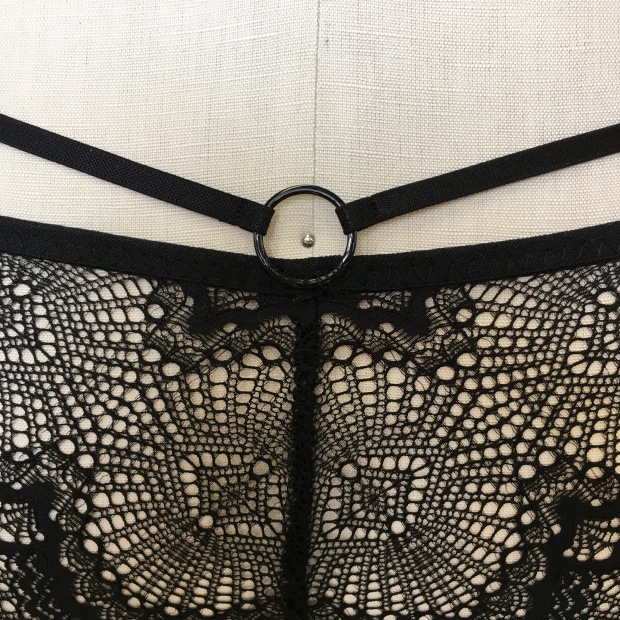
Just look at that symmetry in the lace!

If you are interested in making a version of this set for yourself, here are some notes that may be helpful:

My Simplicity 8229 modifications:

  • If you want the scalloped edge of the lace to run around the entire bottom band, then the band elastic is not turned under for finishing. You simply attach the 1/2″ or 3/4″ picot elastic with two rows of zigzag stitch on the inside.
  • Adjust the band height at center back to accommodate a 2-row hook and eye (it is drafted for a 3-row).
  • I used cut and sew foam as the under-layer for added stability for the straps and overall boost.  Since the foam is sewn with abutting edges rather than overlapping with a 1/4″ seam allowance, be sure to trim those edges by 1/4″ before sewing together with a zigzag.
  • Since I added the straps by eye as I went, I did not mark the pattern ahead of time for the placement of the innermost strap.  But I believe it landed about 3″ down from the top of that seam line at center front.
  • The middle strap covers the seam between the inner and outer cup pieces and is tacked at the apex with a few small machine stitches.
  • Per Maddie’s recommendation, I shaved just over 1/2″ from the top of each cup where it would normally attach to the shoulder straps (which are not used in this design).  This made that outer strap angle properly toward the metal center front ring. I attached that strap along the top edge of the bra starting at the underwire along the underarm.
  • All straps are tacked down with a few small machine stitches at the upper edge of lace along the top of the cups.
  • Each strap is attached separately at the center top ring, rather than running through the ring and then back to the cup or up over the shoulder.  And I did not use rings and sliders on the straps.  As a result, the straps have no ease beyond their elasticity so fit is crucial. Take your time.
  • The physics of my initial version – an almost exact duplicate of Maddie’s – did not work perfectly. I found that adding the second upper strap at the center front ring gave me the lift I was looking for. Plus I like the look of the extra straps in back.
  • The upper straps will peak out from under just about every item of clothing I have.  If that bothers you, you will need to plan accordingly and maybe add a Sewaholic Lonsdale dress to your sewing queue.

My Evie La Luve Bella panty modifications:

  • Simply add 3/4″ metal rings at center front and back. I hand stitched them.
  • Run 1/4″ satin elastic strapping from center front to center back on each side.
  • Getting the right strap lengths requires a few try-ons.  There is a fine line between sitting perfectly snug on the top of your hip and cutting in so tightly that a bulge is created in this spot where I, at least, want to avoid any bulge.

And maybe just one more photo of those lovely straps:

IMG_3544

PatternsSimplicity 8229 and Evie La Luve’s Bella panty, both modified
Fabrics: Gorgeous black galloon stretch lace and most other supplies are from my favorite, Tailor Made Shop; 1/4″ satin elastic strapping from MarySupplies; 3/4″ metal rings from Porcelynne
Modifications: Five yards of 1/4″ satin elastic strapping and a few 3/4″ metal rings
Photo Locations: Visual Arts Center of Richmond Fibre Studio
Thank you to Madalynne for providing the inspiration and some guidance on the modifications.
Soundtrack: Sigur Ros radio on Pandora

Harriet bra in lace with foam cups

I sewed a top this past weekend – an actual garment that I can wear outside my house without wearing other clothing over it.  And I am thrilled with how it turned out.  But I haven’t been able to take pictures of me wearing it yet. So instead, today, I will show you the bra I made last night.

img_1482

I love the Cloth Habit Harriet bra pattern.  It took me a few variations to to get the sizing just right, but now that I’ve got that sorted, it will likely be my go-to bra pattern for a bit.  And I learned last night that I love it even more with foam cups.

img_1473

I heard Amy is going to put together instructions for making the Harriet with foam, but I am impatient and decided to give it a try on my own.  I started by re-reading her step by step 3-part series, Making a Foam Cup Bra. If you want to give Harriet in foam a try now, I highly recommend it. Amy is a wonderful teacher.

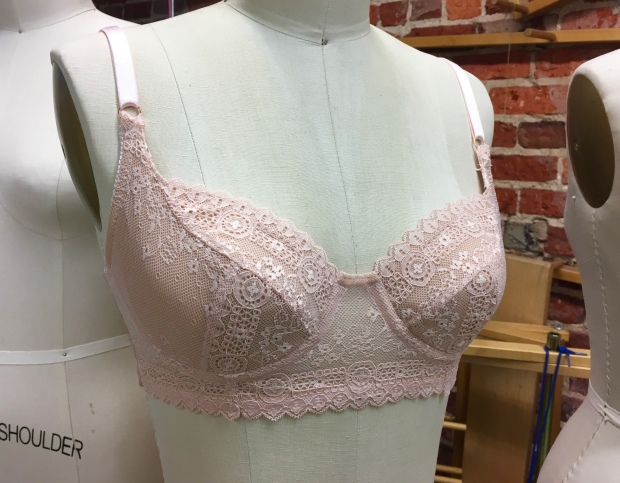
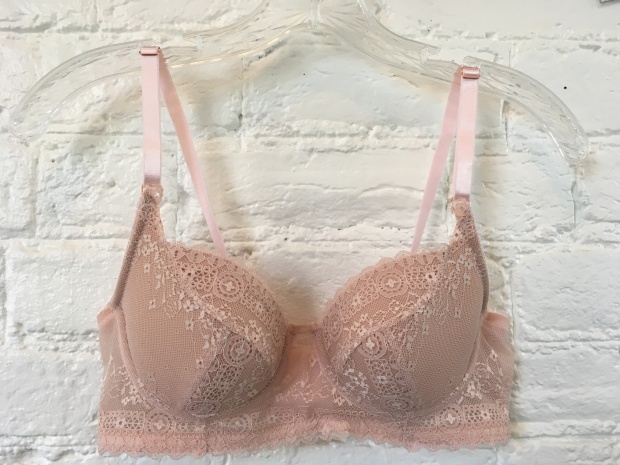
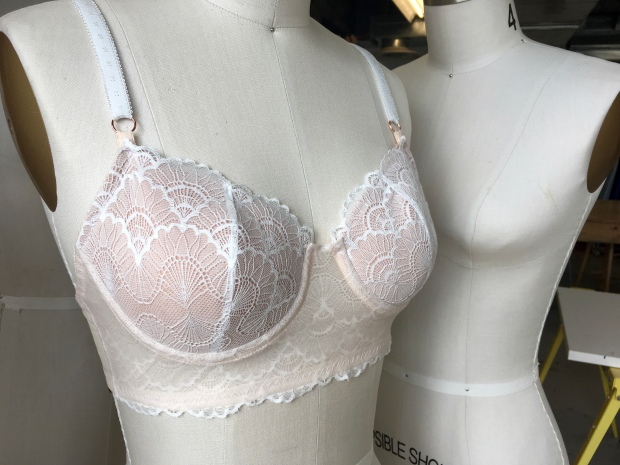
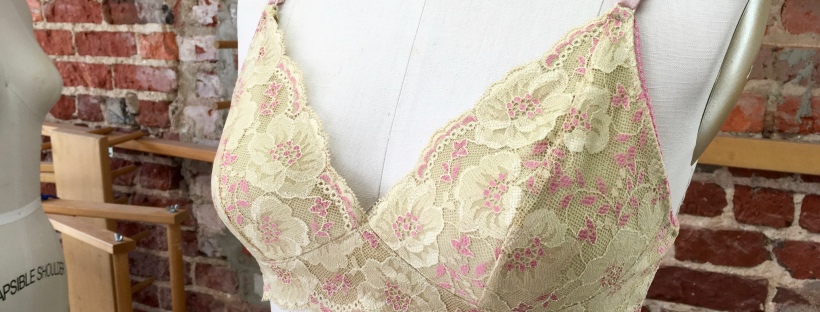
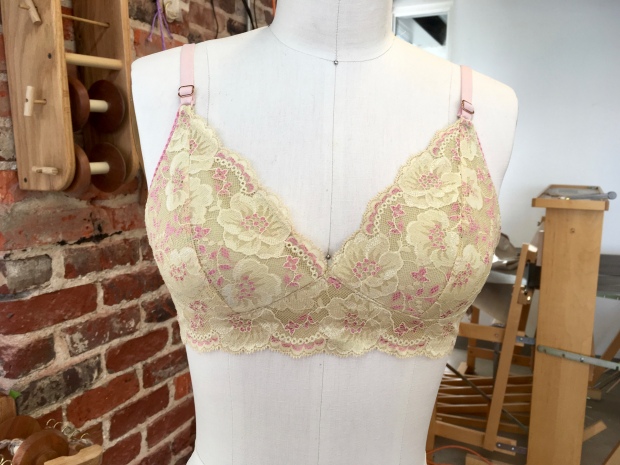
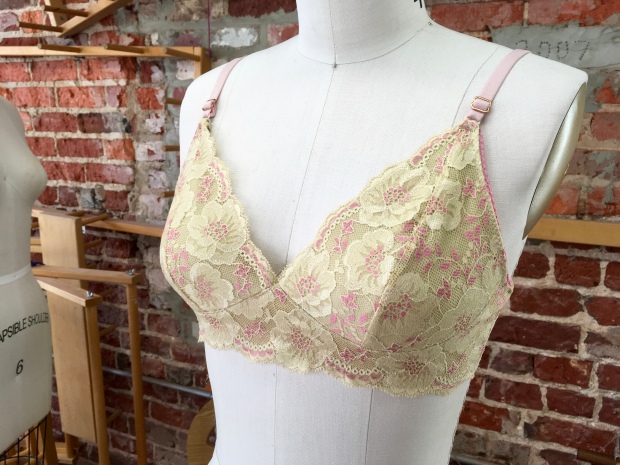
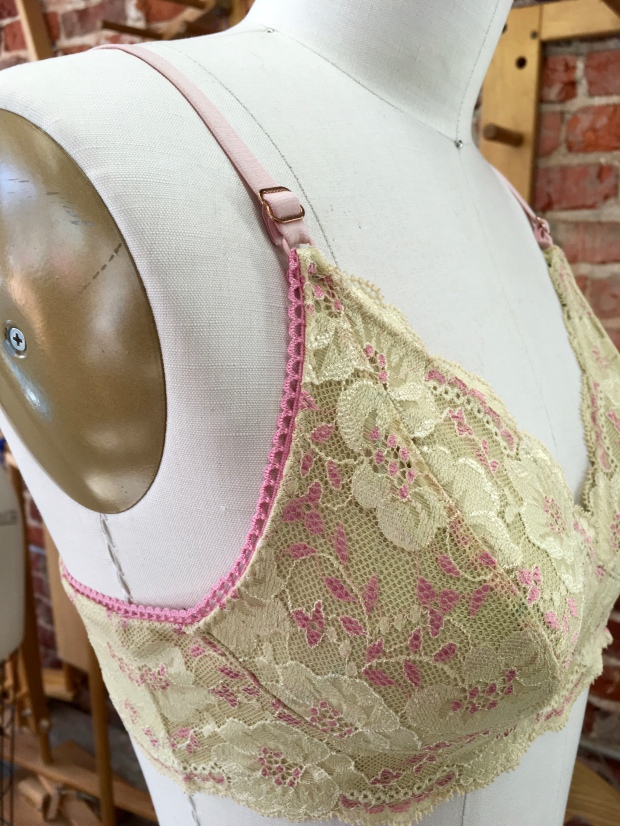
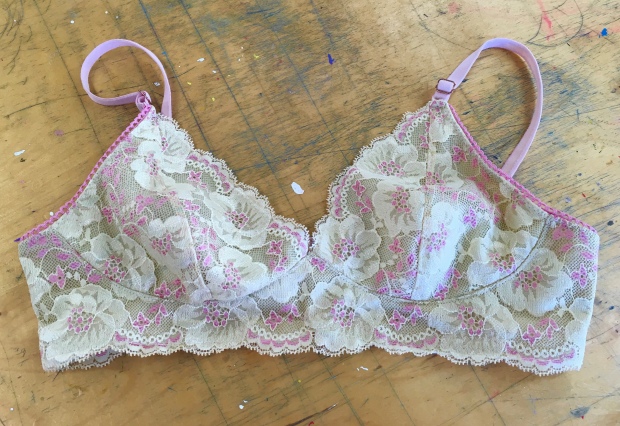
I made this bra with a nude/pink lace kit from, you guessed it, Tailor Made Shop. I agree with others that nude bras can be a tad boring, but this lace makes it as not-boring as a beige-ish bra can be.

img_1481

Since I made this version with a lace outer layer, lining it up so the lace scallops extend up over the edge of the foam, I secured the lace to the foam with 505 adhesive rather than sewing with right sides together and flipping it as Amy does in the tutorial.  Then I simply tacked the lace to the foam in a few keys places where the stitching would not be too obvious.

img_1485

If you look closely, you can see where the foam cup ends, just at the bottom of the scallops along the upper bust edge.

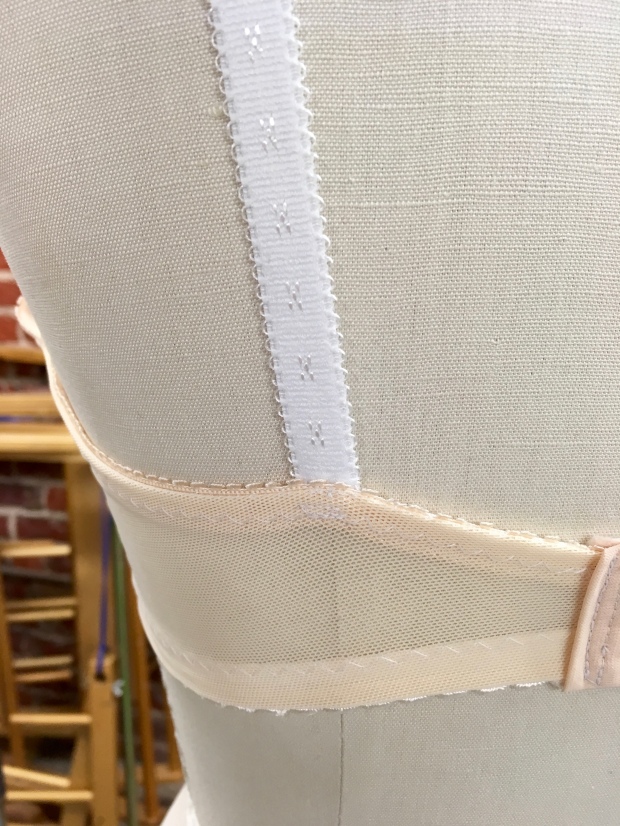
As you can see, I left the lace scallops along the bottom of the bridge and cradle as well.  I simply attached picot elastic to the inside with two rows of zigzag stitches.  However, because I needed to turn under the elastic on the back bands in order to finish that edge, I had to cut the back bands a bit taller to accommodate taking the turned under picot elastic (since I wanted that finished piece to be as tall as the side of the cradle).

img_1461

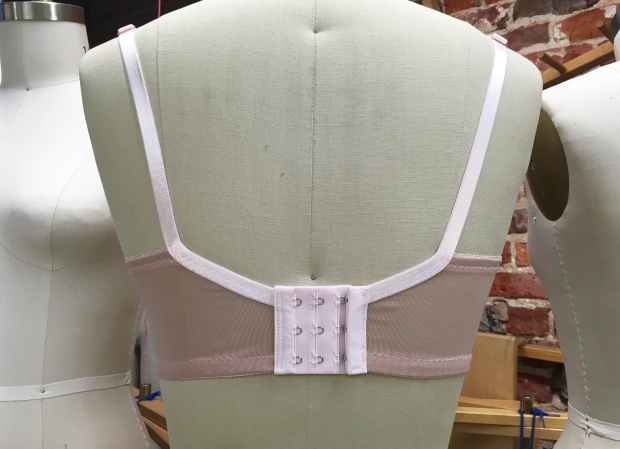
Since I made the bands taller for this version, I was able to use a 3-row hook & eye tape without any additional adjustments. I’m still getting used to all those hooks in back, but they really do make the band feel much more secure without being tight.

img_1467

I should point out, that while the lace along the bottom of the front of the bra looks beautiful, it is not going to be a common modification for me. Within an hour or so, the lace is all bunched up under the cups.  Not really a good look or very comfortable.  So going forward, I think I’ll go back to turning the hem elastic under.

img_1464

But my goodness, that is beautiful, isn’t it?

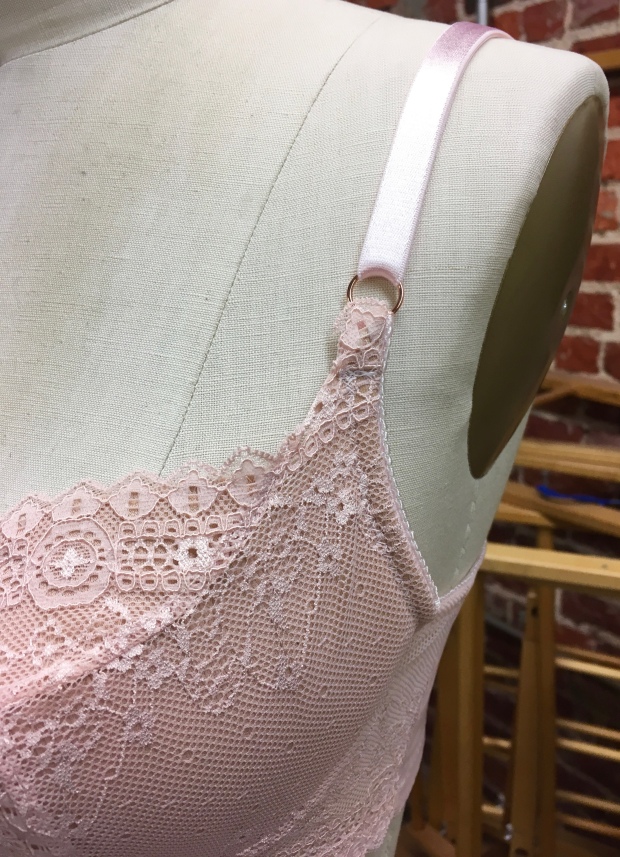
The one item that I do not think Amy’s tutorial covers (because the bra style she uses in that series is different) is how to best manage where the cup pieces loop through the rings that attach the straps.  I suspect I should have done more trimming than I did – of either the lace, foam, or even both, and I am very much looking forward to learning how I could have done this better – but I just wung it, trimming nothing and pushing the top of each cup through the loop and securing it with a couple rows of stitches as usual (plus, I confess, a couple teeny tiny stitches to try to hold some rogue lace edges in place).

img_1477

So, if you’re a less-endowed woman like me looking for a little extra oomph, or just prefer foam cupped bras for whatever reason, I highly recommend trying the Harriet with foam. There is a little extra work up front with the pattern pieces, and the steps are a little different than with a traditional cup lining, but there are already resources out there to help (and there are more to come), and it is totally worth the extra effort.

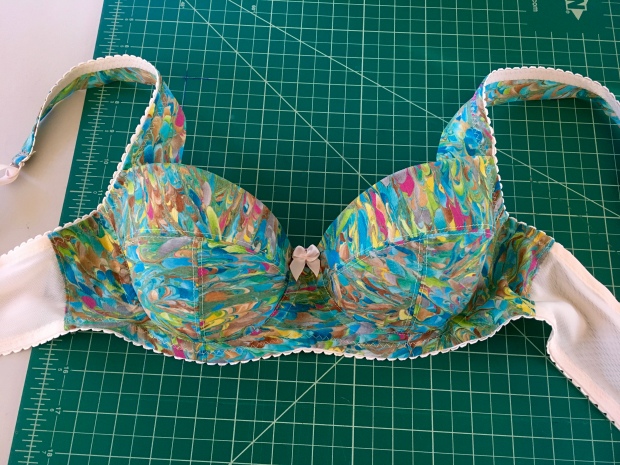
One flat shot:

img_1442

Pattern: Cloth Habit’s Harriet, size 30D
Fabrics: Nude/pink bra kit from Tailor Made Shop, foam from Bra Maker’s Supply
Modifications: Adjusted shape of bridge and lengthened bands (same as in previous version) and adjusted the band height to accommodate the lace front lower edge
Photo Locations: Visual Arts Center of Richmond Fibre Studio

Harriet Bra in Silk Chiffon

Also known as, the prettiest item I have ever made.

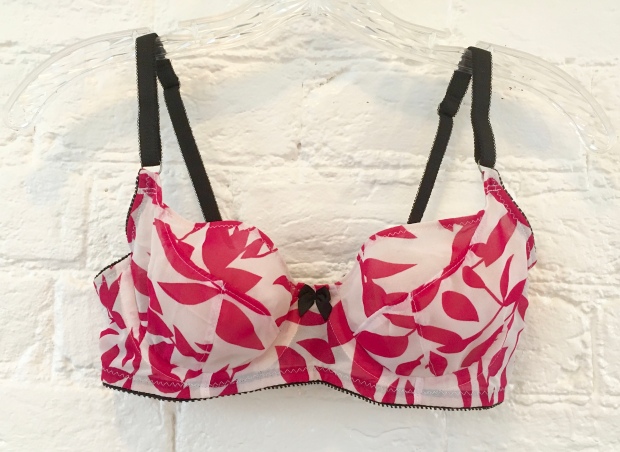
img_1303

Have you ever finished a project and been so pleased with the results that you literally jumped up and down, hooting and screeching in pure excitement?  No?  Because that was me on Tuesday when I finished sewing this beauty.  I hadn’t even put it on yet.  I ran upstairs, busted into my husband’s office and could barely contain myself, pushing it in front of him to gaze at confusedly.  Then I tried it on. I’m super thankful it fit, because even if it had squished me into pancakes, I’m pretty sure I was still going to wear it.

This is my fourth Harriet Bra.  I made my first two at Camp Workroom Social last October; taught by the designer, the one and only Amy from Cloth Habit.  While I was thrilled to have made those bras and they felt comfortable at first, by the end of the day it was a very different story. But I love the design and shape it gives, so I was determined to keep trying.

img_1326

I made my third Harriet (un-blogged) a couple weeks ago, using a kit from Bra Maker’s Supply.  I did not make any adjustments to the pattern since I had a new and final version of the pattern and knew that Amy had made a few small adjustments since camp.  But the fit was still not right.  I thought the band was just too tight, so I added an extender giving me another 1″ of length.  But even with that, the center tips of the wires were digging into my sternum to the point of actually causing small bruises. Not a good look.

img_1327

After my trip to Philadelphia and making a couple of Madalynne’s Simplicity 8229’s, I realized that the shape of the bridge of my Harriet may be my problem.  So I traced the shape of the S8229 bridge and re-shaped the Harriet bridge to match. I also lengthened the back bands by 3/8″.  (So while my pattern size is 30D for the Harriet, my band is actually just over an inch longer than that.)

img_1269

You can see my modified bridge pattern piece here. The changes look small but are actually quite significant.

Those changes have made all the difference. This bra is not only beautiful, it shapes well – even without foam, and is comfortable.

img_1317

img_1320

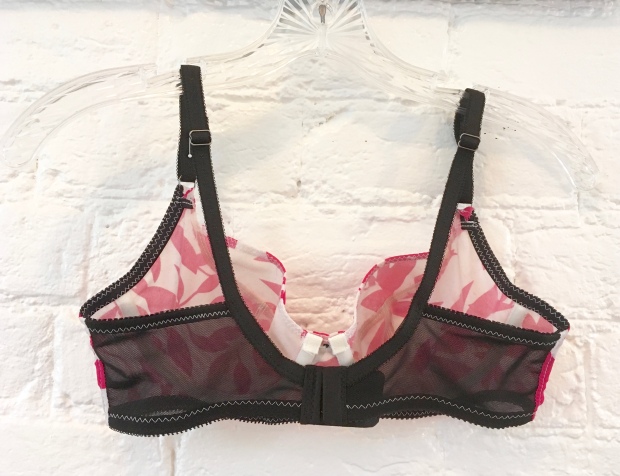
A classic U-shaped back.

Most of the supplies for this bra came in a bra kit from the wonderful Tailor Made Shop. The outer fabric is another story. That is a silk chiffon that I picked up at Jomar-Swanson in Philadelphia last weekend.  I snatched it up as soon as I laid eyes on it.  My brain tried to talk me out of it – I rarely use drapey, semi-sheer fabrics in my sewing projects, and I really shouldn’t ever buy fabric again ever in my life – but having just come from a bra making workshop, I told myself that it could one day make a beautiful bra.  The yard of it cost me $2.  Totally worth it.

Though I will say, it was not the easiest fabric to work with. When I use it again for another bra and/or matching undies, I may try a stiffener to keep it from shifting around quite so much.

img_1335

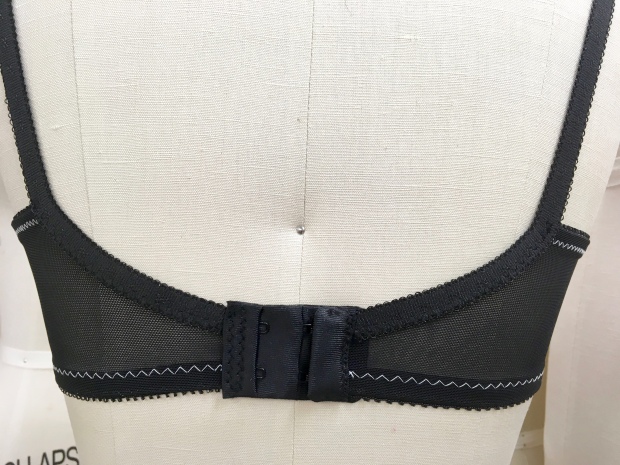
I made view C and lined the bridge, cradles and three cup pieces with sheer lining. Since I was not using a lace upper cup, I followed the instructions for view A for that portion.  For those looking for the nitty gritty, I cut the fabric and lining as one for the upper cup (using 505 Spray & Fix), lining the top edge along the selvedge to avoid fraying and finishing with 1/4″ clear elastic, but cut all other pieces separately so I could follow Amy’s instructions to get a nice neat inside with no exposed seams. I used power mesh for the band and a 2-row hook and eye since that fit the height of the band best.  I may  modify for a 3-row hook and eye for my next version.

img_1340

Rather than cut the casings at the stitch line at the center front, I fold them down for just a little extra padding underneath where they make contact with my skin.

And yes, there will be more versions.  Though I may stop blogging each and every one of them since my guess is that it is getting a bit annoying.

Pattern: Cloth Habit’s Harriet, size 30D
Fabrics: Outer silk chiffon from Jomar-Swanson, other findings from Tailor Made Shop
Modifications: Adjusted shape of bridge, lengthened bands
Photo Locations: Visual Arts Center of Richmond Fibre Studio

Megan Nielsen Dove Dress

After my sewing slump at the end of 2016, I wanted to kick off 2017 with a completely new-to-me project that would require a bit of commitment and concentration. I decided the Megan Nielsen Dove blouse to dress hack would be a great project to start with.

So yes, I made and finished this dress weeks ago – I’ve even worn it out – I just hadn’t gotten any pictures of me wearing it until this past weekend.

img_5519

Honestly, I thought this would be a pretty straight forward modification given that the designer has a superb tutorial walking you through the steps of turning her pattern into a dress.  And that part was easy, but it was just the beginning for me.  This dress is the reason I make muslins of just about every project I sew.  It was huge on me.

img_0382

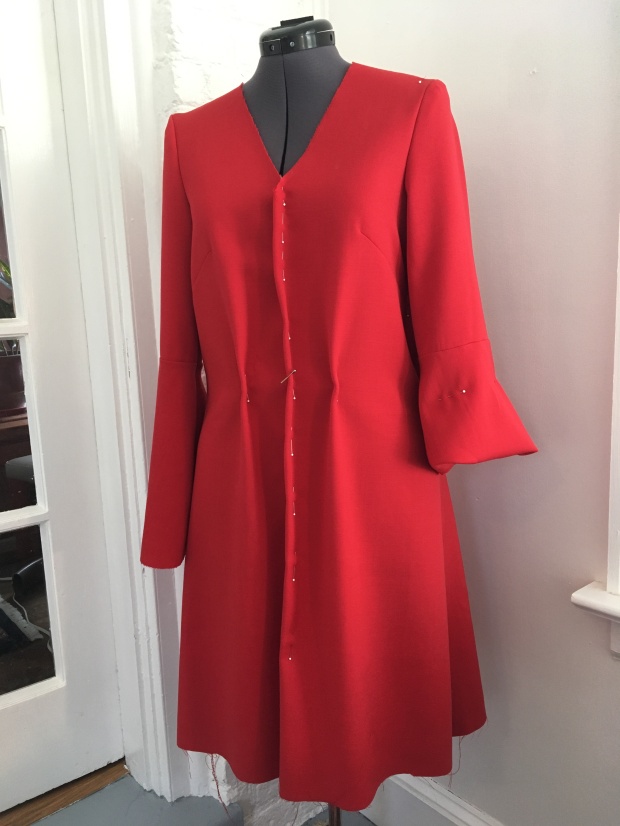
Practice dress in vintage red wool suiting. Sadly, this fabric was in rough shape – faded and stained in spots – when I acquired it.  Otherwise, I’d never have used it for muslining.

In retrospect, I should have started with a smaller size.  When I used the measurements chart on the instructions my bust fell in the x-small range while my waist and hips were small and medium (no surprises there; this is pretty common for me).  So I split the difference and cut the small.  However, when hacking this pattern from blouse to dress you can easily adjust for your waist measurement and you use your own hip measurement, so my initial size choice was not the best place to start for this hack. But rather than print, tape, and cut a new pattern, I decided to work with what I had, which was not the most efficient way to proceed.

img_5524

That said, the necessary modifications went slowly, but very smoothly.  I started by pulling 1.25″ from the center front. I normally do not like to do this, but there was just way too much fabric and this change did not bring my side seams forward noticeably. It also helped bring up the V-neck slightly, which I was hoping for. Next, I increased the side seams at the waist (fading to nothing at the armholes) and from the hips to the hem.  These changes eliminated the need for front darts which you see pinned in the pic above. Then, I added double-ended darts for shaping in the back.

img_0394

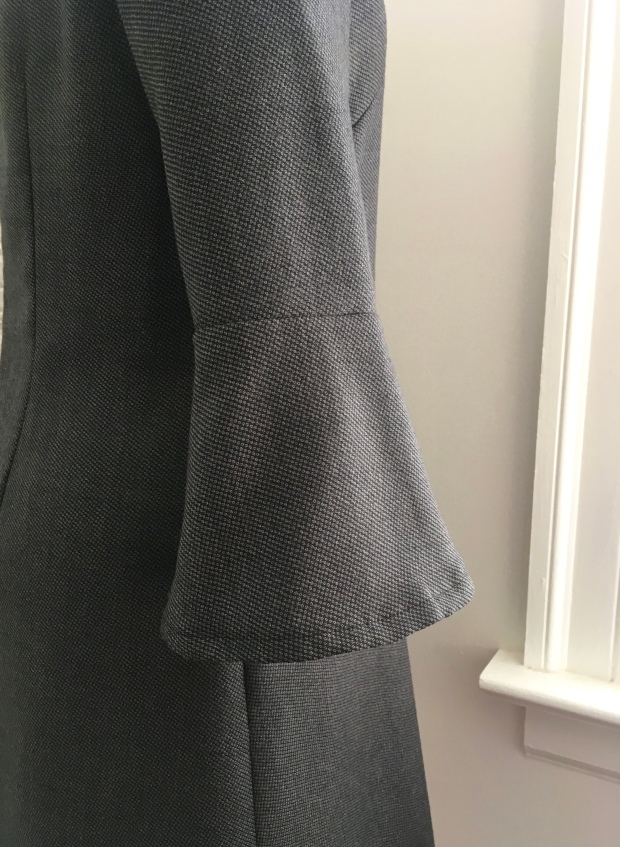
The final changes were smaller and easier: I straightened the hem (personal preference), narrowed the shoulders slightly, narrowed the sleeves where they meet the flounce and narrowed the top of the flounce accordingly, and shortened the flounce on each sleeve by half.  I like my sleeves at bracelet length (any longer and I keep pushing them up),and the original sleeves were just far too 70’s for me. Whether I did any of these adjustments in the correct order or if they were not the correct adjustments to make to fix this fit – I do not know.  But they worked for me. There is still a small bit of pulling at the front armhole seam when I move my arms behind my back, but, well, I just won’t do that.

After I made all of these changes on my red wool muslin dress, I adjusted my pattern – since chances are I will make at least one more of these – and sewed up my dress, which was a breeze. The only issue I had was with the hem. I did not use the hem facing provided with the pattern since I was doing a straight hem rather than the original split shirt hem.  But this wool blend did not take a traditional turn-under-twice hem well.  When I put the dress on, the hem looked all choppy no matter how diligently I pressed it.  So I unpicked it, added a loop of interfacing and re-hemmed it.  That helped, but it’s still not fully to my liking.

img_5541

At this point, I must admit, I was feeling pretty proud of myself. I have almost always had somebody available to help me with pattern modifications,even if it is just to help me with pinning out excess fabric. I did these adjustments myself with dozens of trips between my sewing room and my only full-length mirror upstairs. They were straightforward, but time consuming.  Had I attempted this project in the end of 2016, I have no doubt I would have just tossed the muslin and moved on.

img_5526

I wore this dress, the night I finished it, to an inaugural celebration for Richmond’s new mayor. It is not the most flattering or unique dress I own — I admit, this initially bothered me a bit, but then I reminded myself that not all custom-made items need to scream one-of-a-kind — but it was a good dress for a reception after work hours when I had no idea what the dress code would be. It will be a good dress to wear to an office (if I ever go back to work in an office).  And there is an added bonus: it is one of my few handmade dresses that does not have a fitted waist! This means this will hold a regular spot in my dress rotation at events where food and beverages will be available.

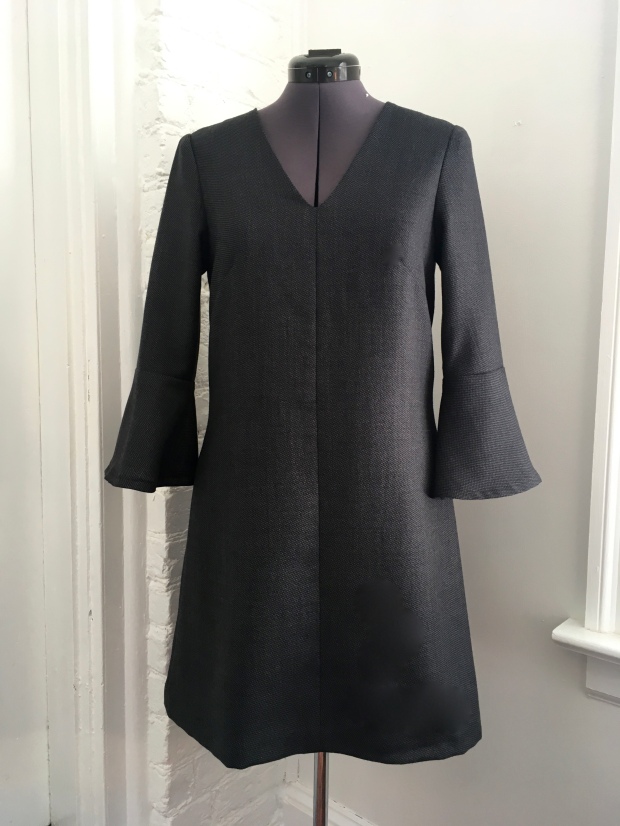
Here are a couple pictures on my dress form:

img_1237img_1240

And as always with me, while it may be a bit dull and conservative on the outside, the inside practically glows.

img_1234

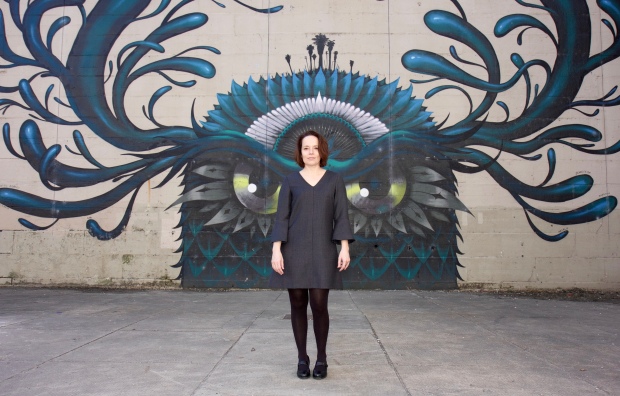
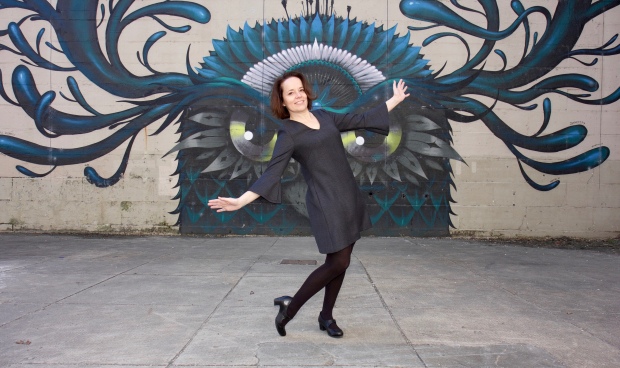
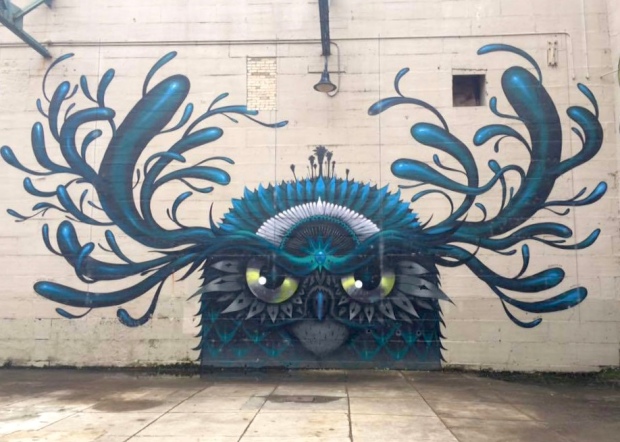
I should have put the dress on inside out for one shot in front of the mural. The colors would have been perfect!

Here’s one shot of this mural without me “posing” – if you can call it that – in front of it.

13700175_870263256452099_5380333936034285897_n

I would be surprised if I do not make another one of these dresses this year.  It is a fun pattern that, for most, will come together pretty quickly. Don’t let my lazy size-choosing mistake deter you.

PatternMegan Nielsen Dove Blouse (turned into a dress), size small
Fabric: Black & grey small checked wool blend (I should totally burn test it for fiber content); lined in vintage Si Bonne cotton rayon blend in bright turquoise.
Modifications: Followed steps laid out on Megan Nielsen’s website to convert pattern from a blouse to a dress.  Then took 1.25″ from center front, increased the side seams by varying amounts from the armhole to the hem, added back double-ended darts, narrowed the shoulders slightly, narrowed the sleeves at the bottom and flounce at the top, shortened sleeve flounces by 4″, straightened the hem.
Mural: Owl by Jeff Soto, painted in April 2012 at the James River Power Plant Building and Floodwall, as part of the 2012 Richmond Virginia Street Art Festival. This is quite possibly my favorite mural in Richmond.  The owl in it’s original colors can be seen here.
Thank you to Brian, who kindly took two rounds of photos of me in this dress.

Simplicity 8229 & Bra Making with Madalynne

I love taking sewing classes, even if the content is not new to me. I love hearing people’s tips and tricks, listening to sewing-related chatter and the hum of machines all around me, meeting new people, and having a reason to dedicate a block of time to my favorite hobby.  So when I set my sewing goals for 2017 and put making more bras on my list, I decided I wanted to take another class.  Now I know what you’re thinking — yes, I took bra making at Camp Workroom Social last October and absolutely loved it.  But I had let so much time elapse before making a bra on my own that I had started doubting my abilities and memory of which fabric to use where, etc…

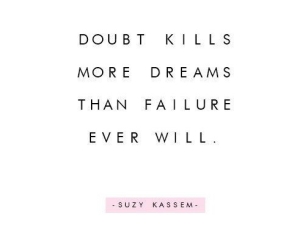
doubt-kills-more-dreams-than-failure-ever-will_daily-inspiration

Side note: I need to print and frame this Closet Case Patterns post and hang it in my sewing room, stat. Seriously, just make it already!

I could not find any bra making classes locally – this is not at all surprising, we desperately need a sewing school/shop in Richmond (and yes, I’ve considered opening one myself but am far too risk averse) – so I looked elsewhere.  Anybody who sews bras, dreams of sewing bras, or even just likes bras, has heard of Madalynne.  Her blog and IG feed are full of perfectly lit photos of beautiful handmade lingerie. So I started there. And low and behold, there was an underwire bra making class just a couple months away. I signed up almost immediately.

Of course, between then and the workshop, I got up the courage to make my first bra on my own, and then a couple more, in fact, but I was still psyched for my sewing road trip.

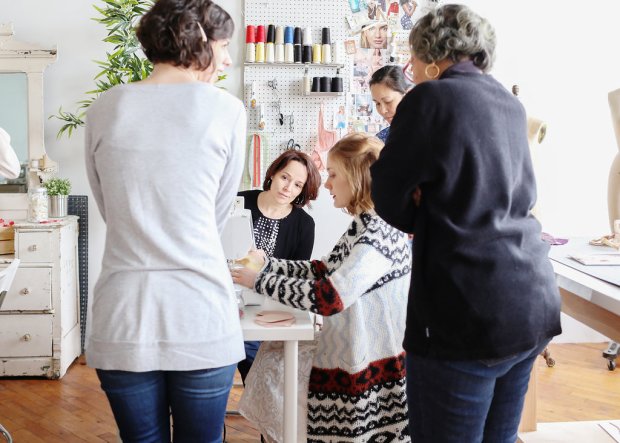
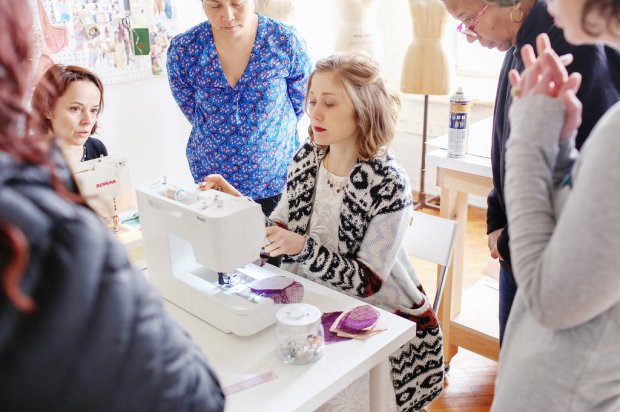
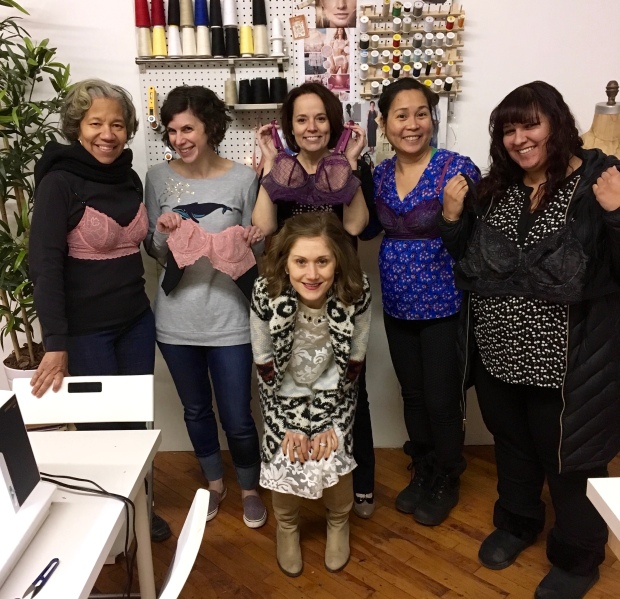
The workshop, held in Madalynne’s studio, a super-feminine space in a huge old warehouse, was this past weekend.  It was everything I had expected from a Madalynne workshop: intimate (five students plus Madalynne and two assistants), friendly, fun, full of yummy food and special treats, and Instagram-y.

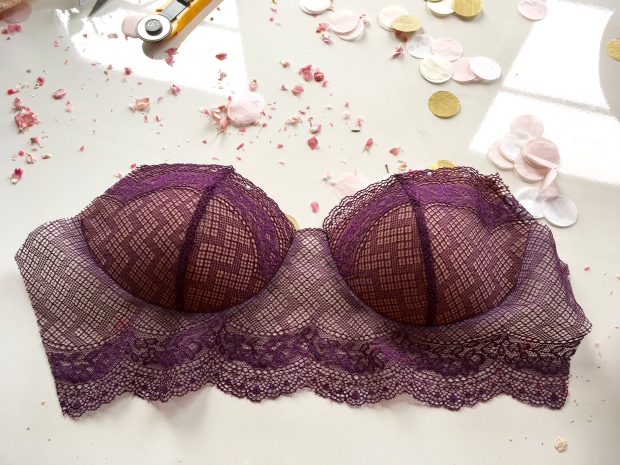
bra-making-madalynne-february-2017-30bra-making-madalynne-february-2017-28

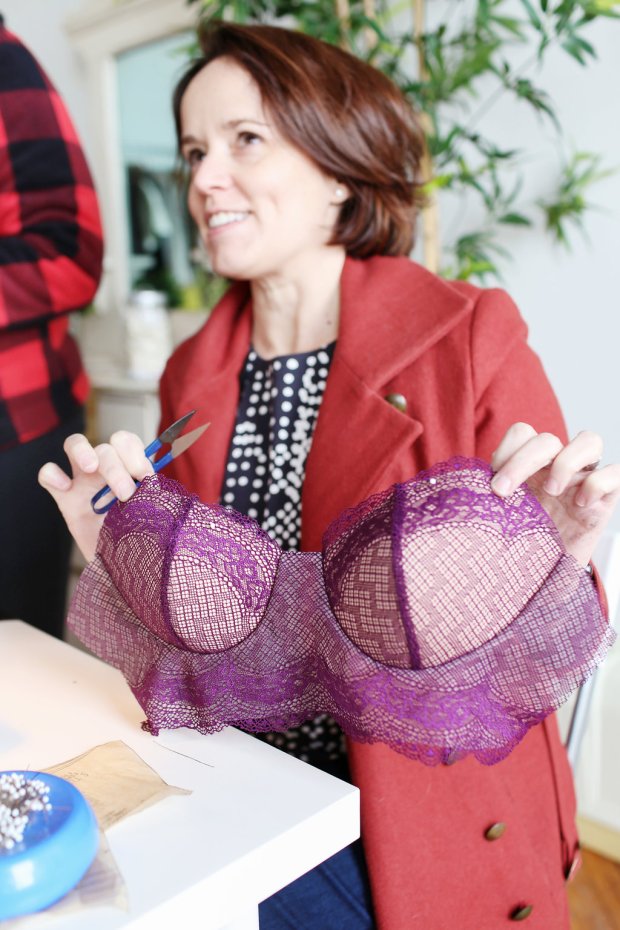
Before I signed up for the workshop, I emailed Madalynne to enquire if I could make her bra design using foam in place of regular cup lining.  She was clear that this was not something she had done in a workshop before and that others would be using the more traditional supplies, but encouraged me to give it a go and promised to help however she could.  When I arrived, she had already cut samples from foam and decided to make the sample bra using foam as well.

bra-making-madalynne-february-2017-51

img_0891

There was, of course, pink and gold confetti and dried rose petals sprinkled everywhere.

This bra, unlike all of the others I have made so far, has a straight back, which I think is also sometimes called a camisole or a t-back.  The top of the back band is relatively straight, rather than curved like a U, and the straps simply get tacked to the elastic at the top of the band, rather than running along the slope of the band and into the hook and eye attachments. The Boylston, Watson and Harriet all have U-shaped backs, also known as ballet back or leotard back. (If you look at my posts on my first Boylston and Watson bras, you can see pictures of the u-back style to compare to the picture below.) I was worried this style may not feel secure, but I’ve been pleasantly surprised so far.

This is also the first time I have used a 3-row hook & eye set. They are Madalynne’s preference. I think they may be mine now as well. I think the wider band helps the whole bra feel more supportive and secure without having to be too tight.


img_1085

Since I made a weekend of it (Philadelphia is four+ hours from Richmond by car), this trip was not cheap – the cost of the workshop, plus my hotel with parking for two nights, and gas added up quickly – but guess what, it was totally worth it.  The bra I made, with the kit provided by Tailor Made Shop, is beautiful.

img_1076

img_1079

I also made some new friends:

img_0906

When I got home, I immediately cut my next version. This should surprise nobody. I made this version with a kit from Tailor Made Shop as well (plus foam from Bra Maker’s Supply).

img_1113

img_1202

Here is a close-up of the lace.  I wish I’d purchased some of this in the other colors before it sold out. Though, honestly, I have no shortage of beautiful laces right now 🙂

img_1206

I only had 2-row hook and eye sets in my stash, so I simply adjusted the height of the back band as needed. And look at that pretty strap elastic.

img_0986

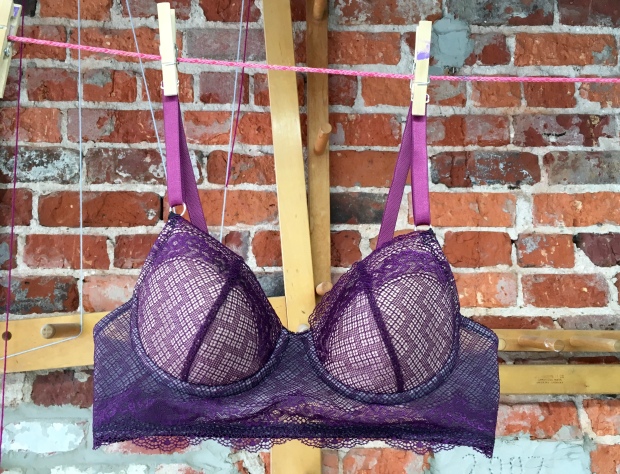
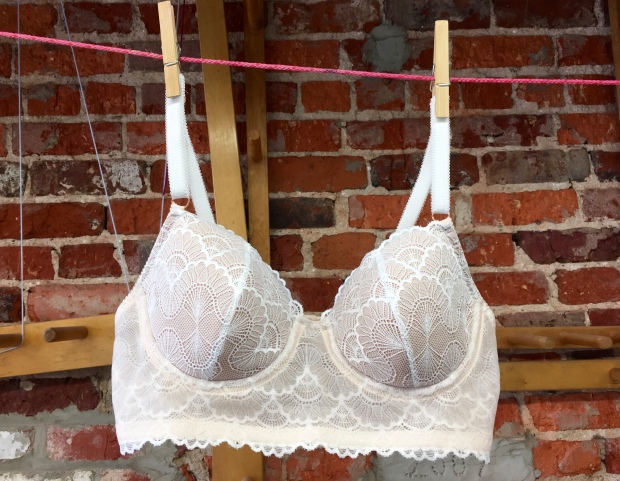
Here are a couple flat shots.  These are not up to the Bra Making with Madalynne and Tailor Made Shop standards, I must have run out of dried rose petals and confetti yesterday, but they’ll do.

img_1148img_1150img_1155

I learned several very important lessons when making these two bras:

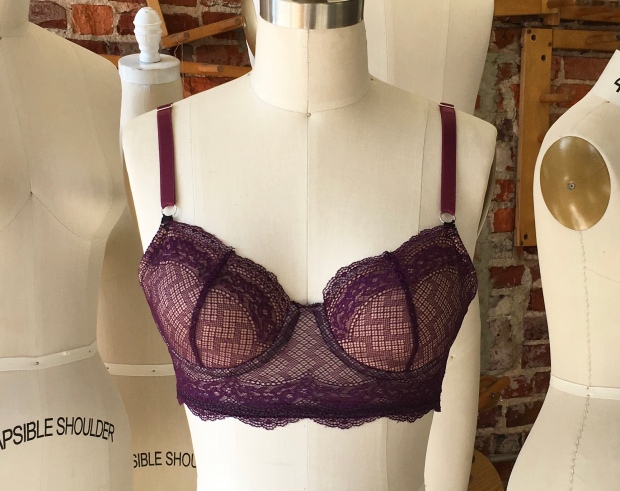
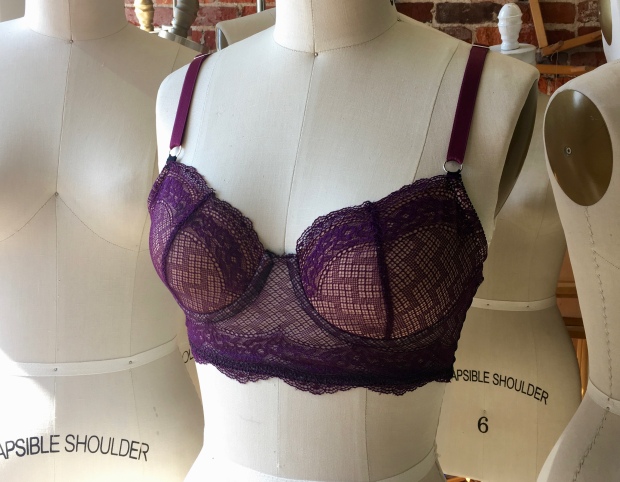
  1. I attached the frame lace and frame lining with spray adhesive before cutting.  The adhesive started to wear off before I sewed in my cups and lower elastic.  I should have basted them together or re-sprayed them with glue but thought I could make it work. I was wrong. The lace  is a bit bunchy under the cups even when the lining underneath is pulled taught. You can see this in the flat shot of my purple bra above.  Lesson learned.  I did not have the issue with my second version.
  2. When attaching the underarm elastic, Madalynne recommends leaving extra length at the top of the cup to string through the strap loops. I gave myself the perfect amount on my purple version –  when I have the bra on, the elastic is still short enough to not show above the lace at the top of the cup. I left the elastic too long on my white version.  You can see it stretched below the loops on the photos above on the dress form.  It is not the end of the world, I will certainly not re-do it on this bra, but I will know to be more thoughtful next time around.
  3. I get a bit of bulging along the elastic in the underarm area along the top edge of the frame (between side of the cup and the back band).  In class, Madalynne mentioned that she occasionally does as well, and to correct that she increases the seam allowance between the frame and the band to 3/8″ at the top, fading to the usual 1/4″ at the bottom.
  4. I need to get better at remembering to trim away the extra foam along the underarm elastic seam line. Bulk there is not attractive, at all.

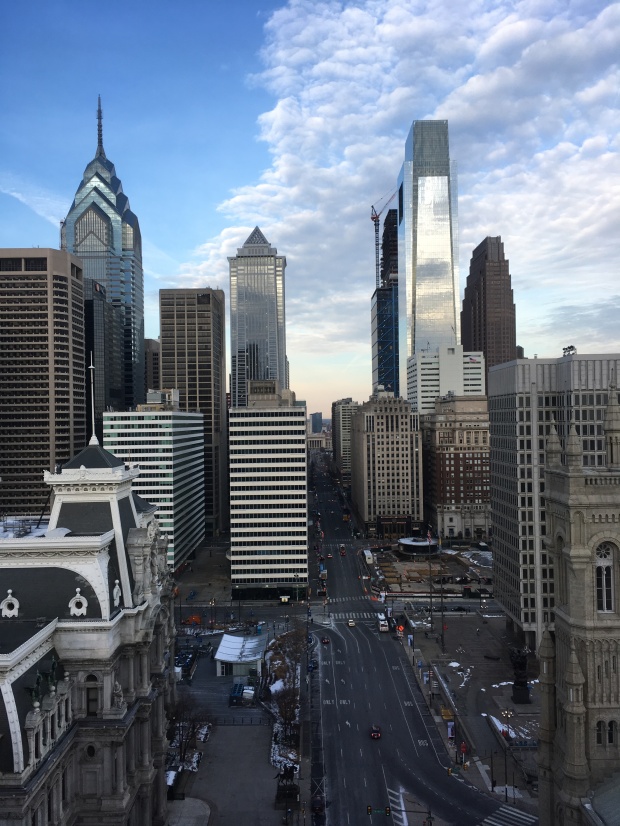
Since the workshop ran all day on Saturday, I drove up the night before and left the day after the workshop.  The view from my hotel room alone was worth the nightly rate. If you are headed to Philadelphia and are looking for a place to stay, I highly recommend the Courtyard Marriott Downtown. Request a room overlooking City Hall (skipping dinner each night will make up the extra cost and is well worth it, IMHO).

img_0872

img_0885

Pattern: Madalynne’s Simplicity 8229, size 36A
Fabrics: Bra kits from Tailor Made Shop (plus foam from  Bra Maker’s Supply)
Modifications: None, so far
Photo Locations: Visual Arts Center of Richmond Fibre Studio, Madalynne’s studio, and Courtyard Philadelphia Downtown
Thank you to Madalynne for sharing the photos from her studio


Watson Bra in lace

Continuing on my quest to make my perfect bra, I decided to give the Watson Bra, by Cloth Habit, a try.

img_0663

I may be the very last seamstress on the planet to make this bra, I know.

This is the first non-underwire, non-foam cup bra I have worn for more than a day in years.  Padding has always been my friend.  While the shape this bra creates is not my most flattering and it’s not the most supportive bra I own, it is more comfortable than any of my other handmade bras so far.  I can definitely see wearing this on days when I don’t leave the house (most days when you work from home) but bother to change out of PJs or workout clothing (less often than I’ll ever admit) and days spent puttering about, running errands, etc… Oh! and I wore it to sewing class last night, of course, since it is my most recent make.

img_0674

I made this bra using: the Trio Dijon bra kit from Bra Makers Supply; pink underarm elastic that I had in my stash; plus sliders, rings, hooks, eyes and light pink straps that I cut off one of my ready-to-wear bras.

img_0677

As you can see, the straps I salvaged off one of my RTW bras are just barely long enough – I have them fully extended without a millimeter to spare.

I did not like this bra kit. The fabrics included were unlike the fabrics I’ve received with other bra-making kits, even from Bra Maker’s Supply. There was no sheer lining. Instead, this kit included a stretchy and almost cushy fabric in addition to the lace and powernet.  As a result, the bra feels a bit thicker than I had intended and the insides are downright unattractive since said fabric refused to stay flat for topstitching. Plus, I think a non-stretch lining would have lifted the girls up a bit more.  I went back to the website to see if I maybe ordered something incorrectly or at least get details on what this fabric is (I am still  new and learning about the array of fabrics one uses to make bras) but this kit is no longer listed.  Oh well.  Lesson learned.

That said, if you are new to bra making, or just want to avoid the headache of tracking down all the supplies, I still think bra kits are a great way to go.  I just ordered five — yes five — from the best of the best in bra kits, Tailor Made Shop (my argument being that I *saved* money since I qualified for free shipping).

img_0662

After following the measurement guidelines included with the pattern, I made a 34B. This is the same size as my Orange Lingerie Boylston Bras, but a different size than the Cloth Habit Harriet Bra I made at Camp Workroom Social in October (size 30D, but that band is just far too tight for me; I’ll be lengthening that the next time around).  I recently measured myself for a Madalynne 8229 – which I’ll be making at one of her workshops next month – and I measured a 36A.  Perplexing.  And further proof that the number (and letter) on your tag does’t mean a whole lot.

Here is my one and only flat shot.

img_0682

As for visible seam lines under clothing — an important factor for me when considering underpinnings: the scalloped lace around the neckline definitely camouflages that edge under clothing, making that line invisible.  But the cup seams still show through a well-fitted t-shirt.  That may be due to the somewhat bulkier than normal lining fabric. More research is needed, but this bra is definitely less visible under fitted clothing than either of my Boylstons so far.  Am I the only person considering creating an Excel table showing the pros and cons of each bra style I try?

I will be making more of these, for sure.  But, I have a couple different styles to try before that in my queue.

Pattern: Cloth Habit Watson Bra
Fabrics: Trio Dijon bra kit from Bra Maker’s Supply, plus elastics, hooks, etc… from stash
Modifications: None, this was essentially my muslin
Photo Location: Visual Arts Center of Richmond Fibre Studio
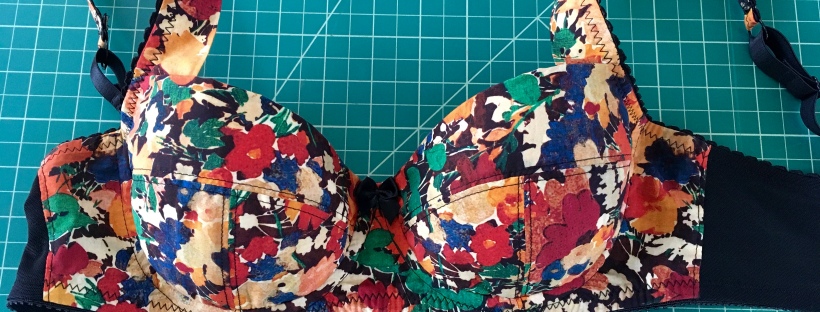
Boylston Bra in Liberty Print

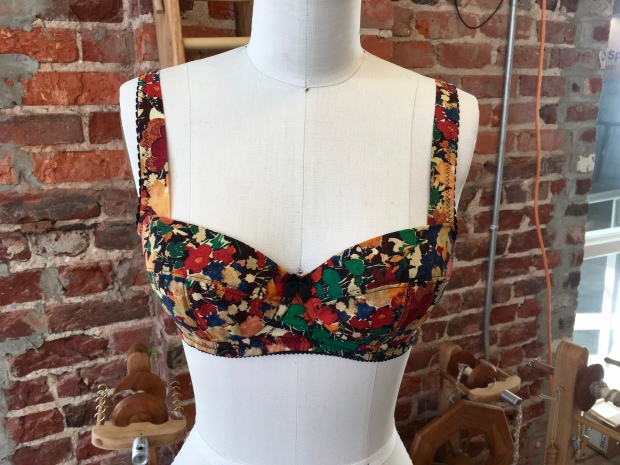
I made another Boylston Bra; this time in a very special Liberty tana lawn that was gifted to me by a close friend.

img_0638

There isn’t much to say about this one since I just finished my previous version. Though, I will say that somehow, the top of the upper cup is almost a teeny tiny bit too snug on this one.  This could normally be attributed to simply using a different fabric, but given that there is foam underneath, that shouldn’t be the case here.  My best guess is that I did not accurately document the changes I’d made to the cup the first time around and the pattern for this version is just a tad different.  C’est la vie.

img_0640

In addition to the gorgeous Liberty fabric, I used black lining and power net that were left over from my bra-making class at Camp Workroom Social, plus hooks, eyes, sliders, rings, and elastics from a “Small Findings Kit” and foam from Bra Makers Supply.

My one peeve with the two Boylstons I’ve made so far, is that they are not invisible under clothing.  The seam lines across the cups and top edge are not smooth. I know this should not bother me – everybody knows I am wearing a bra under my tops – but I do not like visible seam lines from underpinnings.  My next bras will have lace along the top of the cups to try to minimize this.

img_0683

The strap elastic in the Bra Maker’s Supply Small Finding Kits is wider than I was expecting. I don’t love the way it looks, but by golly it is stable.

I haven’t attempted to cover the seam lines between the three pieces of the foam cup with tricot strips yet (despite the fact that Amy from Cloth Habit has a superb video all about it).  It seems (ha!) to me like that would just add bulk, potentially making them even more visible from the outside. But I have not ruled out trying it on a future version.

img_0684

That wraps up my Boylstons for now.  But don’t fret, I finished a new-to-me bra pattern over the weekend that I’ll be sharing soon.

PatternOrange Lingerie Boylston Bra
Fabrics: Liberty of London tana lawn, plus leftovers from Camp Workroom Social and additional supplies from Bra Maker’s Supply
Modifications: I took the changes I made on my first version and attempted to make them to my pattern pieces with moderate success.
Photo Location: Visual Arts Center of Richmond Fibre Studio

Boylston Bra in crepe

Whenever I tell people I make my clothes they seem surprised at first, then nod their head, and say something about how their grandmother or mother used to sew.  But there are a few items, that non-sewing people almost always struggle to believe I made myself – bathing suits, jeans and bras.  Do they think they are traditionally made by machines?  They’re also three things that many women hate shopping for, myself included, largely because finding the right fit is incredibly difficult due to the wide variety of lovely shapes women’s bodies come in.

I tackled bathing suits back in 2013 and have a Sophie Bikini on my short list for this year; jeans were the scariest of the lot to me, but now, six months and three pairs later, I almost take for granted that I can make a new pair anytime I want; but bras, well, those took me a little extra nudging.

I made my first bra at Camp Workroom Social last October:

img_9253

Two Harriet bras, designed by Cloth Habit. The top one is a muslin used to test the fit.

I came back from camp excited and determined to replace every single ready-to-wear bra in my drawer.  I ordered fabrics and supplies. And then the doubt crept in.  You see, at camp, I had the bra’s designer and two ridiculously capable seamstresses helping me every step of the way, explaining which fabric to use where, what stitch length and width was best, reminding me to sew the elastic with the plush side up on the good side of the fabric first… Now I was on my own (well, as on my own as one can be with Google).  Every time I glanced in the direction of my box of supplies I got overwhelmed.  Plus, there was the added issue of the fact that my camp bras did not fit me in a way that I was completely comfortable.  Not only was the band far too tight, IMHO, causing back and under arm fat rolls that I simply could not tolerate, but the shape just didn’t do my girls any justice.  So this time around, I wanted to use a thin foam lining.  That was just another hurdle my brain struggled to get over.

Then, Closet Case Files posted a link to this post on Instagram. What a beautiful bra.  And it was very similar to what I wanted to make – an Orange Lingerie Boylston bra in woven fabric.  A fellow camper and I both commented that we hadn’t made a bra since camp and Heather nudged us on, reminding us that we had done it once and could do it again.  So I did.  I’m telling you, that woman could tell me to sew all my clothing inside out and I’d probably do it.

IMG_0591.jpg

Just look at that beauty!

I printed my pattern, cut out my fabric, and got started on assembly on Sunday afternoon.  I then worked on it for about an hour on Monday, and by the end of my class Tuesday night it was complete.  And it is pretty much perfect. Even the fit.

IMG_0595.jpg

You can almost see the crepe texture of the fabric in this shot

The fabric is a crepe that has been languishing in my stash for years (another piece from the estate of two deceased seamstresses that I purchased for <$2/yard).  The pattern on it reminds me of the 80’s and I always assumed I’d use it for a small inside pocket or facing  or a lining.  But then when it came time to make my first Boylston, which is designed for light woven fabrics, it seemed like a good choice since I had no idea if the size I chose would fit and I wouldn’t be too distressed if it went into the donation bin.

img_0576

The foam, elastics, hardware, underwires, bow, and secondary fabrics came from Bra Maker’s Supply plus a couple leftovers from camp.

img_0567

Nice and neat on the inside

img_0587

Close up of the front of strap where it meets the cup

img_0588

Close up of the back of the strap

img_0581img_0586


I found this bra went together very smoothly, but I will say I found the directions a bit sparse, at least as a newbie.  And the instructions include no information on adjustments you ought to make when using foam.  So, if you decide you want to try this pattern out, I found Lauren’s two posts on foam cup Boylston bra assembly indispensable and basically just followed along with those (here and here). Lauren references a trio of posts from Cloth Habit on making a foam bra that I highly recommend following as well, especially Part II.

img_0561img_0565

I had hoped to start my second Boylston bra this afternoon – I do have a drawer of ready to wears that clearly need replacing! – but got a bit sidetracked by life today. But I already have a special Liberty fabric, plus all the other materials I need, set aside and hope to have it done by the end of the weekend.

If you’ve been thinking about making a bra I highly recommend the Boylston.  If you are feeling intimidated, give it a go with the help of the links above.  And if I can be of any assistance, please let me know.

Pattern: Orange Lingerie Boylston Bra
Fabrics: Vintage crepe plus bra making supplies from Bra Maker’s Supply
Modifications: I slimmed the back band to fit into the two-hook closure and adjusted the foam cup seam allowances before butting them together under a zigzag stitch – that’s it!
Photo Location: Visual Arts Center of Richmond Fibre Studio


Planning can make all the difference

I sewed quite a bit last year.  36 pieces, in fact.  Many of those get worn and I’m proud of having made them (Jeans! I made my own jeans! This still amazes me).  However, toward the end of the year, in early November actually, I became listless. I stopped picking projects because they were something I really wanted to make or wear, and started making projects simply to keep making and stay busy.  I started choosing patterns I thought would be quick and easy and rarely spent enough time making necessary adjustments or pairing those patterns with the right fabric, instead just pulling a decent option from my fabric stash. I cut corners and got sloppy, two things I rarely do in any facet of my life.  As a result, and not surprisingly, many of those projects ended up in the donation box.  So my wardrobe was no more interesting than before and my fabric stash, while a bit smaller, is still embarrassingly large.

I’m approaching this year differently. Rather than focusing on volume and decreasing my fabric “collection”, I made a list of clothing items I actually want to add to my wardrobe. It all started with my #2017makenine list on Instagram:

img_0324

StyleArc Lorie jacket | Closet Case Ginger jeans (pairs 4&5) | Vogue 8633 in navy wool | Closet Case Kelly Anorak – hopefully in red | Gertie’s Butterick 6413 | Megan Nielsen Dove Blouse to Dress hack | Vogue 1316 – in old denim just like Handmade by Carolyn’s | Closet Case Sophie bikini | more bras

That list has already changed a wee bit…  I’ve added a few pieces:

  • A Mondrian dress to wear to the ‘Yves Saint Laurent – The Perfection of Style’ exhibit coming to the Virginia Museum of Fine Art in Richmond this May.

Yves Saint Laurent Mondrian Dress (1965) in cream & navy

Yves Saint Laurent Mondrian Dress (1965) in cream & navy.  My plan to draft the pattern for this dress involves duct tape.

  • A Grainline Archer to wear out running errands when I am too lazy to change out of my yoga pants but want to cover my behind.
Grain line Archer shirt

Grain line Archer shirt – I’m not sure if mine will be plaid

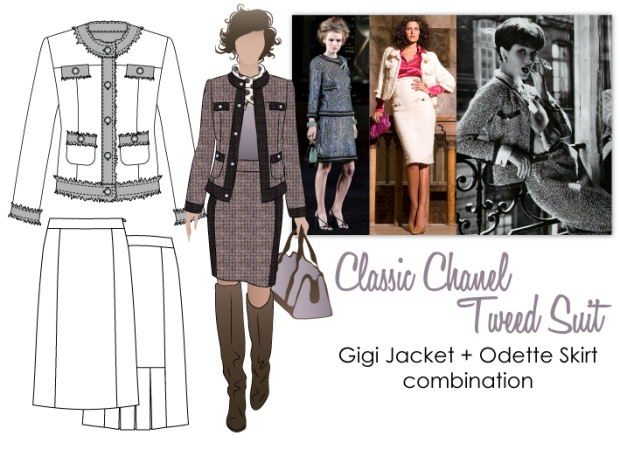
  • And possibly a Chanel-esque suit using a couple Style Arc pieces I just discovered.
gigi-classic-tweed-suit

I’ve also removed/substituted an item:
  • After further thought, I think it is unlikely I’ll make the Gertie/Butterick dress.  While I love that dress on Gertie, I highly doubt I’d feel comfortable wearing it out.  Instead I’m going to make a different party-appropriate dress, like the By Hand London Elisalex dress or maybe even my own version of Roland Mouret’s “Galaxy” dress.
Roland Mouret's Galaxy dress

Roland Mouret’s original “Galaxy” dress

If/when I go back to work full time, I may need to adjust my plans further, depending on how much sewing time I have and a possible office dress code.  And let’s be honest, I can pretty much guarantee a new pattern will be released this year that I will need to make immediately (Closet Case has a new pattern coming out next week…). But that is one of the best parts of having a plan: just because you have it, doesn’t mean it is not flexible. It’s just a place to start.

And you want to know the best part?  I own almost all of these patterns and most of the fabrics.

I just recently completed my first item from the list – the Megan Nielsen Dove Blouse hacked into a dress in a beautifully drapey black and grey checked wool blend.  I’ll hopefully get some pics of me wearing that posted here shortly. But here’s a quick snap on Violet.

Megan Nielsen Dove Blouse pattern hacked into a dress with straight hem and shortened sleeves

Megan Nielsen Dove Blouse pattern hacked into a dress with straight hem and shortened sleeves

Given that I am a planner by nature, it’s a bit odd that I’ve never approached my sewing like this before.  Even just three weeks into the year I’m already finding it much more enjoyable and less haphazard.  And having this process in place just may help me cut back on pattern and fabric purchases (well, maybe).

Now to decide which piece I’ll make next…